Monday, January 31, 2011

Oscar


This is Oscar. 
He is our dog. 
He is a member of our family. 
He was our first baby. 
He is old now.

I remember the day I brought Oscar home from a local Miniature Schnauzer breeder.  It was a warm, early-June Saturday morning.  Kevin was at work and I was nervous.  We had moved into our house and put down brand new carpet the previous summer and I dreaded the thought of pee and poop everywhere!

Yet, I had wanted to get a dog and I knew that puppies needed training.  Oscar was a quick learner and we received a lot of great advice from my parents who had been raising Oscar's uncle for a few years already

Oscar has been a faithful dog.  He has tolerated the birth of one baby and then another and then another.  He has never complained.  He has never acted out.  He has never waivered from his responsibilities.  He even put up with his toenails being painted hot pink last summer, just because we were bored.

In his geriatric state, Oscar has taken on a not-so-pleasant scent requiring, much to his chagrin, more frequent baths.  He makes more noise these days too, however, not in the way of barking.  He grunts and groans, but not in a way that would suggest he's in pain or discomfort.  This has simply become who he is.

If he's not following me around the house or pacing circles around the kitchen island, Oscar can generally be found in one of two places...

His bed in the kitchen under the desk, or,

Under mine and Kevin's bed, usually on Kevin's side.  I don't know if that part is intentional or if it's just happened out that way.

I will admit that, with the birth of each child, I became more distant with and even more irritated by Oscar at times.  I'd get angry, for example, that it's raining outside, I have a baby crying or children fighting and I've let Oscar out and now I can't find him.  When he finally does make himself visible I then have wet, muddy paws to clean.  All four of them!  It seems trivial now, but in the moment, it likely felt like the end of the world.

Now that I haven't had a baby around for a while, I find myself drawn to Oscar more these days.  Perhaps I feel some guilt over those years when I treated him like he was in the way.  Yet another dependant in my life.  He wants for nothing but to be fed and given a clean drink of water, to be let out when nature calls and to receive the occasional kind words and scratch of the ears.

I know the day will come when Oscar's life on earth comes to an end and it will be a sad day for our family.  It will be a teachable moment for our children and one that will help them grow and learn about coping with one of life's many disappointments.

Until then, I'll continue to enjoy watching Oscar sit on the front stair steps as the late morning sunlight pours in
on his skin until he lays there, panting, with his little pink tongue hanging out.  I'll continue to watch how excited Oscar still gets when he sees that my Dad is at the door, here to spoil him like only my Dad can do.  And I will continue to bake him the peanut butter treats that still make his little stub of a tail wag.
 

Saturday, January 29, 2011

Spaghetti and Turkey Meatballs

To me, nothing says comfort food quite like a pasta dish - whether it be creamy macaroni and cheese with a crunchy topping or a hearty lasagna.  If you throw noodles in there then you've got a meal that warms and sticks with you throughout the rest of the evening.  My grandmother on my Mom's side used to make homemade noodles when I was a kid.  She then would make chicken and noodles.  The dish was legendary and it went with everything.  She served it more as a side dish than a main.  My brothers and I still talk about Grandma's homemade noodles and chicken.  One of my greatest regrets in life is never asking her to show me how the noodles were made.  As interested as I have always been in baking and cooking, I was still the too-busy teenager and then college student to ever think of that. 

I love spaghetti.  Thankfully, that's one dish my kids will readily eat up.  So it's a meal that I turn to often.  I started making my own pasta sauce last year.  Although, there are times, in a pinch, when I'll buy a jar.  I especially like the marinara that Trader Joe's sells.  It's ridiculous how much sugar is added to the typical commercial brands of pasta sauce.  The kind I make?  It has none!

My parents signed me up for a subscription to Food Network Magazine as a Christmas gift.  The day the first issue arrived in my mailbox, I could barely put it down.  Lots and lots of great recipes and beautiful, mouth-watering photographs fill page-after-page.  I had so may page corners turned down it was ridiculous!  It just so happens, the recipe here is featured on the cover of the January/February 2011 issue.

Let's face it; there's nothing new about spaghetti and meatballs.  It's not rocket science.  But, I wanted to try out this recipe, nonetheless.  Perhaps you'd like to give it a try as well.

Spaghetti and Turkey Meatballs
Here's What You Need:
1 Tablespoon extra-virgin olive oil
5 cloves garlic (mashed and minced)
1 28-ounce can plum tomatoes, crushed by hand
1/2 cup fresh basil leaves, divided
1 small piece Parmesan rind (optional)
salt and freshly ground pepper to taste
3/4 pound 93% lean ground turkey
1/2 cup chopped fresh parsley
1 slice stale whole-wheat bread, crust trimmed, bread shopped
1/4 cup part-skim ricotta cheese
2 Tablespoons grated Parmesan cheese
1 large egg white, lightly beaten
12 ounces whole-wheat spaghetti

Here's What You Do:
Heat the olive oil in a large saucepan over medium heat.  Add the garlic and cook a minute.  Add the tomatoes with the juice.  I don't know about you, but I find canned plum tomatoes hard to find.  Again, Trader Joe's is one place I can always find them.  Really, though.  A can of regular whole tomatoes will do in a pinch.  The plum tomatoes taste a bit sweeter, in my opinion.  Throw in 2 cups of water, 1/4 cup basil and the Parmesan rind if you're using it.  I did not.  I'm not in the habit of having Parmesan rinds lying around my kitchen. No!  Really!  Sprinkle in some salt and pepper to meet your preferences and bring it to a boil.  Once it comes to a boil, lower the heat and simmer it until it begins to thicken.  It'll take about 8-10 minutes.  If you did happen to use the Parmesan rind, now is the time to remove it and tell it thank you and goodbye, forever!

Chop the remaining 1/4 cup basil, then mix it with the turkey, parsley, bread, ricotta, Parmesan, egg white and salt/pepper to taste.  Mix it up using your hands.  Form into either 4 large or 12 small meatballs.  I opted for the 12 small meatballs.  Doing so allowed for easy dispersal amongst my five family members and I knew if the meatballs were smaller they would cook up faster. 

Once formed, add the meatballs to the pasta sauce, and simmer, turning, until cooked through.  Should take approximately 6 minutes for the small meatballs or 12 minutes for the larger ones.

While all of this is going down... 

What?!  You never heard of multi-tasking?  Get out of my kitchen then!  Anyway, cook the spaghetti in a large pot of boiling water.  Drain and return to the pot.  Toss the noodles with some of the sauce and then divide among your serving plates.  Plop a couple uh meatballs on top of each place.  Add several healthy shakes of Parmesan cheese, a salad and some crusty bread and you've got a meal to warm you up on a cold winter night! 


Friday, January 28, 2011

Headbanz are Hilarious!

Our kids received several new games for Christmas.  What a relief...not all of them were video games!

I hear less and less people talk about playing games with their kids or their kids playing a game with their friends.  Even my own boys prefer to play the Wii with their buddies over a board game.  After all, says my 10 year old, "They aren't called "bored" games by accident." 

Hardee-Har-Har, Mr. Evan.

One of the games that my daughter, Jenna, received is called "Headbanz."  It is the simplest game on earth and a concept that we're probably all familiar with. 

"Twenty Questions" anyone?

So the basics are this:
  • Stack of cards with colorful pictures of various objects, animals, etc. printed on one side
  • Plastic, adjustable headband that you strap around your head like a hat would sit.
  • Place a card, picture side facing out, into the small slot on the plastic headband, WITHOUT LOOKING AT IT!
  • There's a small minute timer included and you have that much time to go around the circle of players to ask questions and try to guess what's printed on your card.
Kind of a "What Am I?" kind of thing

We didn't keep score when we played. 

There was no winner or loser, therefore, there were no hard feelings.

Almost too perfect. 


As you can see, Owen REALLY got into the game and we found a bit of irony in some of the cards that people drew.  It was "P" week in Owen's pre-K class and he took in his stuffed penguin that he brought home from Sea World.


And Evan, well...let's just say.  We had tacos for dinner earlier the night we played this game and when we have tacos, Evan tends to make a bit of a, well, P-I-G of himself.

Irony?

Note...On Amazon, I see there is an "adult" version of the game.  While I am not able to say for sure, I don't believe the word "adult" on the box indicates that this is some sort of kinky version of a child's game.  I believe, from reading the description, that the rules might be more detailed and the pictures may be of objects that would be harder to guess.  Something tells me though that this game and few glasses of wine would equal a very fun party!

Thursday, January 27, 2011

Jenna's Ribs

Jenna got a great new cookbook for Christmas this year from my parents.  It's called Kids' Fun and Healthy Cookbook, by Nicola Graimes.  There are some fun recipes in there, however, I can do without the recipe incorporating tofu.  Just can't touch that stuff. 

Jenna wanted to use the book to plan out a menu and be in charge of dinner one night recently.  I told her to go through her new book and to pick out a main course to prepare and she would be the head chef!  She chose to make Sticky Ribs and boy, were they?!  The marinade/bbq sauce has great flavor and I would recommend trying this recipe out.  It's great for this time of year when we aren't as prone to use the grill.  Wimps that we are.

Sticky Ribs
Here's What You Need:
2 pounds of pork spare ribs
2 Tablespoons honey
1 Tablespoon balsamic vinegar
4 Tablespoon ketchup
2 Tablespoons brown sugar
1 Tablespoon Dijon mustard
1 Tablespoon olive oil
3 drops Tabasco (optional)

Here's What You Do:
Mix together all of the marinade ingredients. 


Tear off two large pieces of aluminum foil and stack them on top of one another. Lay the ribs on top of the 2 layers of foil. Bring the foil up and slightly around the ribs to create a make-shift bowl. Pour the marinade over the ribs.

Be sure that all of the ribs are well coated. Scrunch the foil loosely around the ribs and twist to seal. Leave this to marinade in the fridge for at least one hour. I went ahead and had Jenna place the foil packet of ribs on a small baking tray. I was worried the foil might get punctured or leak somehow.  The recipe is for Sticky Ribs, not Sticky Fridge, after all!  That was one mess I didn't want to have to clean up!

When your marinating time is up, preheat the oven to 400 degrees. Place the baking tray in the oven and set the timer for 30 minutes. After 30 minutes have passed, take the ribs out of the oven and carefully open up the foil packet. Put the ribs back in the oven for another 30 minutes, or until they are completely cooked.  This was a great recipe choice for Jenna.  She was able to do her homework while the ribs did their magic in the fridge! 


Add a baked potato or some brown rice and a colorful veggie or salad and you've got yourself a...Healthy Meal!  Well done, Jenna!

Wednesday, January 26, 2011

Wordless Wednesday

Tuesday, January 25, 2011

Spunk

"Don't you 'little lady' me, I said.  "I break horses.  I brand steers.  I run a ranch with a couple dozen crazy cowboys on it, and I can beat them all in poker.  I'll be damned if some nincompoop is going to stand there and tell me that I don't have what it takes to fly that dinky heap of tin."

As spoken by a civilized (believe it or not!) Lily Casey Smith from "Half Broke Horses" by Jeannette Walls.  Question of the Day:   Why don't we ever hear the word "nincompoop" anymore?

Monday, January 24, 2011

Cranberry Orange Bread


I know that everyone thinks cranberries are only for Thanksgiving through Christmas, but that's simply not true.  Cranberries are a "super food" and are very high in antioxidants and all sorts of other good stuff.  I will not, however, try to pass this Cranberry Orange Bread off as a health food.  I'm just saying, cranberries can be enjoyed year 'round.  Especially if you over-purchased on a huge bag at Sam's Club and are tired of looking at those little ruby gems staring back at you every time you open your freezer.

Since I had an abundance of cranberries, I decided to make a double batch of this delicious quick bread so I could share with others.  It makes a yummy snack or breakfast.  One day, I even packed a slice in Jenna's school lunch and it was her "something sweet."

This recipe comes courtesy of the good folks at Ocean Spray.  I found it on the bag of cranberries and can also be found on the Ocean Spray website with a host of other wonderful recipes incorporating cranberries or cranberry juice.

Cranberry Orange Bread
Here's What You Need:
2 cups flour
1 cup sugar
1 1/2 teaspoons baking powder
1 teaspoon salt
1/2 teaspoon baking soda
3/4 cup orange juice
2 Tablespoons shortening
1 Tablespoon grated orange peel
1 egg
1 1/2 cups coarsely chopped, fresh or frozen cranberries
1/2 cup chopped nuts, optional

Here's What You Do:
Preheat the oven to 350 degrees.  Lightly spray the inside of a loaf pan with cooking spray.  In the bowl of your mixer, mix together the flour, sugar, baking powder, salt and baking soda.  Add the orange juice, shortening, orange peel and egg.  My cranberries were still frozen so I just scooped them into my little KitchenAid mini chopper and that chore was accomplished in nothing flat!  Fold in the cranberries and the nuts if you are adding them.  Spread the batter evenly into the loaf pan and bake for 55 minutes or until a wooden toothpick inserted in the center comes out clean.  If you find the top of your loaf of bread is plenty brown but the center of the bread isn't done baking, just loosely drape a piece of foil over it so the bread continues to bake but the top doesn't continue to brown. 

Once it's done, allow the bread to cool in the pan on a wire rack for about 15 minutes, then run a sharp knife along the edges, flip it over carefully and allow the loaf to slide out onto the wire rack to continue cooling.

This bread is delicious when it's warm with a little butter melted on top.  It's equally good plain, as well.  Bread like this reminds me of my high school graduation party.  (I won't say how many years ago!)  One of the foods my Mom and I prepared was quick breads like this, sliced thin, with a thin layer of cream cheese schmeared on and then another slice of bread on top and cut on the diagonal.  If you'd like to try this, I suggest freezing your bread and slicing it while it is still slightly frozen.  Likewise, add the cream cheese while the bread is still rather firm.  This particular bread has a very tender crumb and it would fall apart on you if you tried to do this with room temperature bread.  If you have a little girl in your house, this is perfect for a tea party!

Sunday, January 23, 2011

Free Hugs in Sondrio, Italy

Someone sent this YouTube video to my Mom and then she sent it onto me.  I felt the need to share it with all of you who stop in and visit my blog from time-to-time.  These might be the most heart-warming 3 minutes and 38 seconds you have experienced all day.  I hope you enjoy it!

Friday, January 21, 2011

The Big Binder

I've mentioned before about how I'm a bit obsessive compulsive about my lists.  What is it they say? 

"The first step toward recovery is admitting you have a problem."

The thing is, I have no interest in "recovery."  My lists and my organization are actually an asset.  Although, I sometimes think others might snicker behind my back.  I can be a bit over-the-top sometimes.  It's okay.  I'm cool with that.  I can handle the snickers.  Sticks and stones and all that. 

(Oh shoot!  Now I'm hungry for a Snickers.  Why'd I have to go and use that word?!)


My list-making graduated many years ago into a whole new realm of organization.  When I first launched into my year-long Cookie Journey over 12 months ago, I indicated that part of the reason I embarked on that journey was due to my overwhelming recipe collection.  You know, all those recipes that you tear out of magazines, copy from cookbooks from the library or download and print from the Internet.  Then it went a step further I was using old 3-ring binders leftover from college and my 3-hole punch and categorizing them by dessert or main dish, side dish or bread, appetizers or drinks, etc.  Sadly, I have even created sub-categories for main dishes and desserts. 

Then I became a mother, and it was important for me to tear out important reference articles for, well...
future reference.  It finally became apparent that I needed to organize and categorize these newsworthy tidbits as well.  And so, the Big Binder was born.  This is one of those massive 4-inch 3-ring binders.  At some point, in more recent years, I slipped a picture Jenna had drawn for me in the front cover. 

Every book has a cover, after all.


The articles I've saved cover a wealth of parenting knowledge, helpful hints, craft ideas and proven how-to's.


Again, with the categorizing.  It's just something one must do.

Here, you will find, I clip articles about "Crafts and Fun Stuff."  Whether it's a rainy day project, a craft for a school Christmas party or Halloween costume ...you'll find it under this tab. 


Next up is Health and Nutrition, and then I added Safety later on - it's the tab where I would store articles about everything from constipation to "when to call the doctor" to info. on car seats.


I get a chuckle from the tab, Family Issues.  Doesn't every family have ISSUES?!  The ones in question here would be dealing with your common sibling rivalries and "when is a good time to start giving an allowance?"


Development digs into the nuts and bolts of "is my baby reaching their milestones?" and "how to teach my child how to tie their shoes."


On a much more personal note, I decided to give myself a tab, labeled quite simply, "April's References."  Here, you will find anything from book recommendations to the latest beauty products that I might like to give a try.


I have always kept a Travel file in our filing cabinet, but I find that I like this binder for all of those miscellaneous travel articles I might like to refer to someday.  Among those, articles that give names and locations of the best family friendly ski lodges or mountain resorts, etc.


The Binder gets a healthy spring cleaning about once a year.  I go through it and tear out any articles that seem obsolete.  Articles that I've ditched in the past include information on treating diaper rash or how to potty train or moving your child to a big boy/girl bed.  Those issues are clearly in my rear-view mirror.  New articles take their place, though.  I recently added an article about discussing the birds and the bees with your 'tween and "when is your child ready for Facebook and email?". 

The issues of interest are growing up, right along with my kiddos.  I wonder when The Binder will become a thing of the past.  I guess even after my children are off and on their own, I'll still need the "April's References" and the "Travel" tabs.  Maybe I can fit it all in one of those small, 1-inch binders!  I'll have all kinds of room freed up on my desk then!

Wednesday, January 19, 2011

Wordless Wednesday

Monday, January 17, 2011

Blueberry Ginger Hotcakes

I had planned to put some of these together as food gifts for the holidays, but I wanted to try it out on my family first.  Well, between all the cookie baking, and shopping and decorating and gift wrapping and fa-la-laing, I simply ran out of time to do it.  Sooo, with ingredients already purchased back in early December, I decided to go ahead and give it a try anyway a few days ago.  I figured, if it's a keeper, then I'll have that one little idea for Christmas 2011 already in my back pocket.

Or. 

Or!

Wouldn't this make a nice little gift to give someone just for the heck of it?!  Wouldn't it be a thoughtful wintertime pick-me-up to give a friend, or as a "thank you" to someone for helping you out?  Maybe they brought your son/daughter home from practice or maybe a hostess gift for your friend that's hosting Bunco.  The possibilities are endless. 

There are a lot of recipes out there for food mixes in a jar.  You know how it goes, layer all the dry ingredients in a jar and attach the instructions with a pretty little ribbon.  This one is for Blueberry-Ginger Hotcakes and I pulled the recipe from the December 2010 issue of Midwest Living magazine.  The hotcakes (I love that word so much more than pancakes.) have a grown-up taste to them.  Personally, I loved them.  My kids were not so eager to gobble them up.  But then again, they have been spoiled with the Buttermilk Pancakes that I make on the nights we have breakfast-for-dinner.  I would still make this for a friend. 


Okay, clearly this is not a gift-giving jar.  It's an empty Jif peanut butter jar.  I knew it was just for us, so no need to put on airs and act all fancy.  Martha wasn't stopping by for breakfast, so I knew I could get away with it.  This is one of those large peanut butter jars, so you'll need a quart sized jar if you want to make this for gift-giving purposes.  Otherwise, if it's just for you, put it in any old container you like.  No one will care.


Blueberry Ginger Hotcakes
Here's What You Need:
1 1/2 cups flour
1/2 cup whole wheat flour
1/2 cup yellow corn meal
3/4 cup dried blueberries or dried tart cherries (the cherries would make a great Valentine gift!)
1/2 cup buttermilk powder
1/4 cup sugar
2 Tablespoons finely chopped crystallized ginger
1 Tablespoon baking powder
1 teaspoon baking soda
1/2 teaspoon salt
1/2 to 3/4 teaspoon ground ginger

Here's What You Do:
Layer all of the ingredients in the jar in the order listed above.  And then, copy down the following instructions and include it with the jar when you gift it to someone.  If you are wanting to create a complete "experience" for the recipient, you could include a bottle of good quality maple or blueberry syrup inside a mixing bowl with a whisk and a pretty dish towel.

So, here are the instructions:

Shake the jar to mix the ingredients. 
For One Batch:  
Whisk together:
1 egg
3/4 cup water
2 Tablespoons vegetable oil
Add half of the jar (1 3/4 cups mix)
Stir just until combined but slightly lumpy.  Let the batter rest for about 5 minutes.  Heat the griddle over medium heat and when it's ready, lightly grease the griddle.  Using about 1/4 cup of the batter at a time, pour onto the griddle.  Cook for 2-3 minutes total.  Serve immediately with your favorite toppings. 

I had some fresh blueberries that we added to the top with our syrup.  We were fortunate to have some blueberry syrup that my parents brought back for us from their trip to Maine last fall.  The syrup made these hot cakes extra special.  If I were to make these for my kids again, I might leave out the chopped crystallized ginger.  They kept asking what the "chewy stuff" was.  My kids aren't into food with foreign substances.

Hotcakes on Foodista

Sunday, January 16, 2011

Field Trip!

Today seemed like a good day to take the kids on a field trip.  Sure, it was a very cold day and we could have easily just come straight home after church this morning and kept warm inside, but I felt the desire to get out and do something, see something, experience something. 

And, all the better if that something just happened to be FREE!

It's been a year since we've visited the Columbus Museum of Art.  The CMA has been under an extensive remodel for over a year and on our last visit, very little of the museum was open.  Luckily, what little was open was well worth the trip since there was a huge display of Dale Chilhuly's blown glass art for our enjoyment.  I love, LOVE, his work!

The CMA has free admission on Sundays and I was so glad to see such a large number of families take advantage of this wonderful opportunity to experience art in Ohio's capital city.  We even saw the grandfather of one of Owen's preschool classmates there.  The classmate was there too, but was unable to be located at the time.  Bummer.

The main level of the museum invites you directly into the...


And that it is.  There are several hands-on stations to create all sorts of art and get your creative juices flowing.  These little mini-projects served as a catalyst for some interesting conversations between my 3 kids and me.


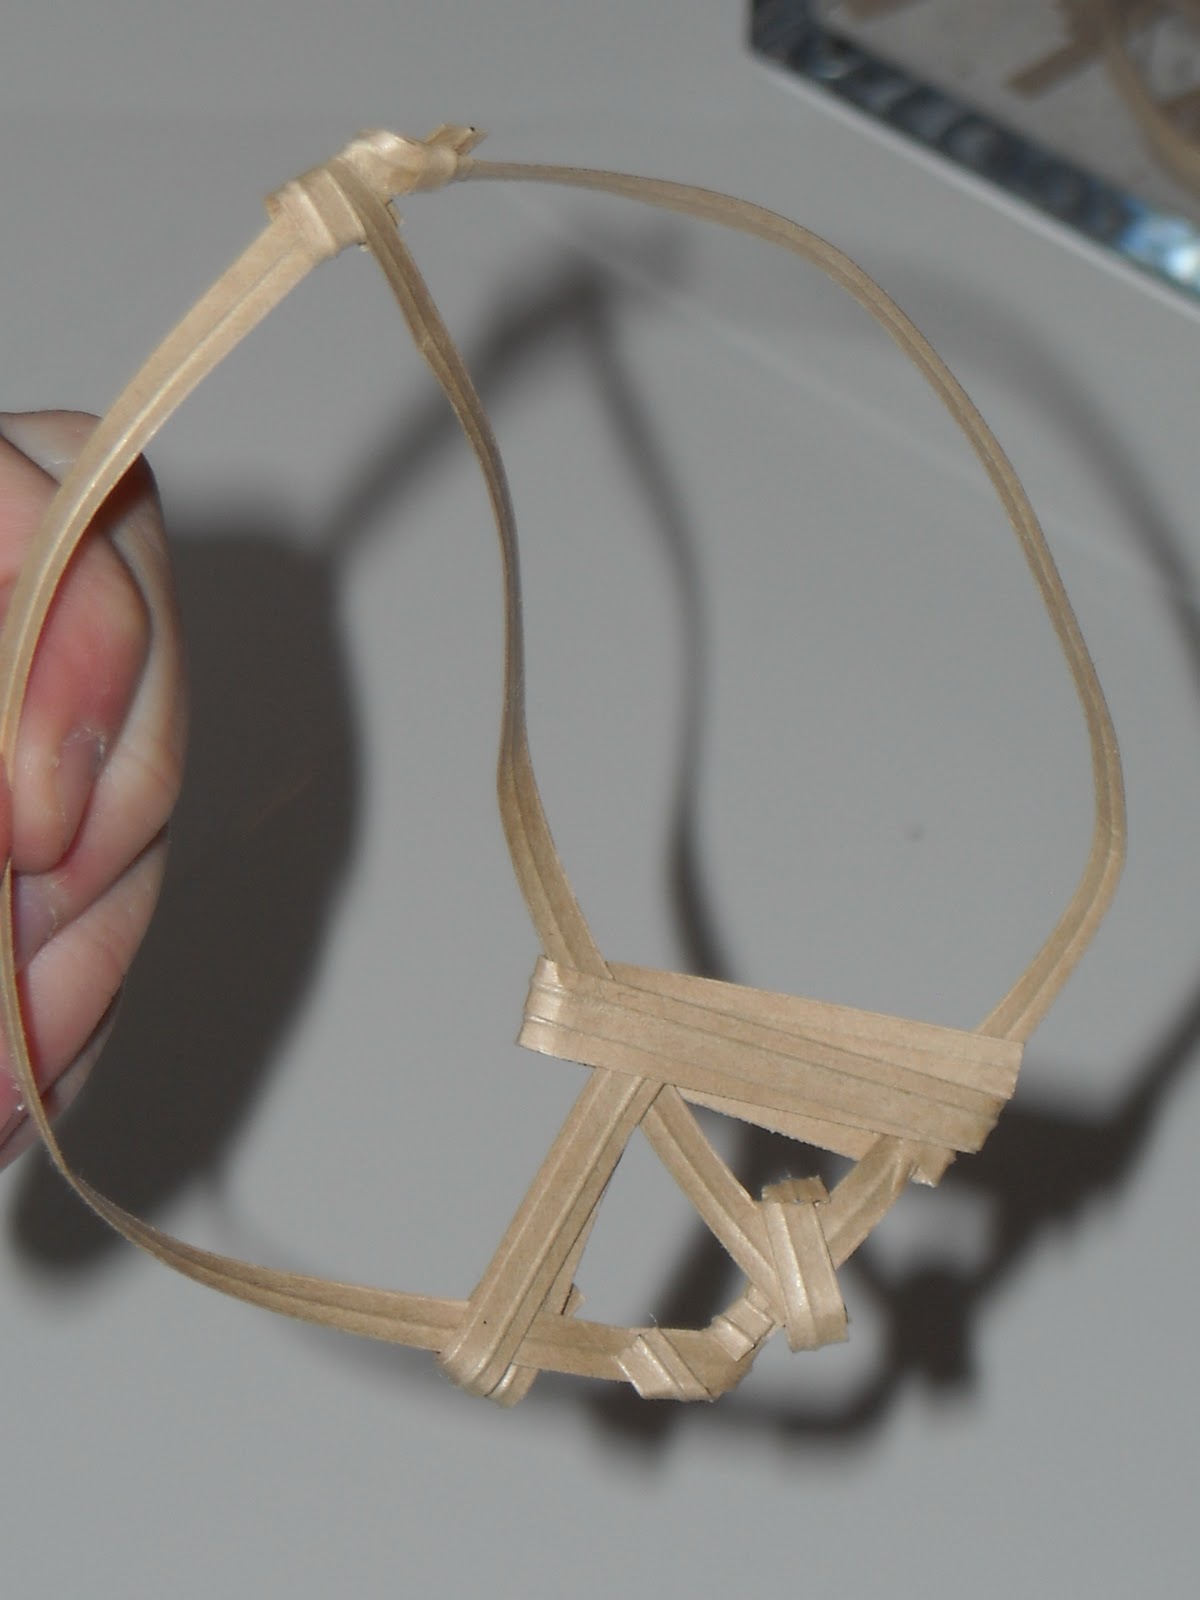
Our first stop was the table where you create something out of extra-long twist ties.  Then they had several shelves on the wall that begged you to display your creation along with others left behind by museum patrons.

I made a flower!

Jenna made her signature peace sign.
 While the kids delved deeper into their twist tie art, I took in some of the beautiful display in the hall, such as this stunning blown glass apple. 


There became a focus on food and art further into this area of the museum which is designed especially for children and families.  Past the blown glass apple, there were photos and paintings featuring apples.  There were some dry-erase type boards for you to answer this question:

"What can you do with an apple besides eat it?"

The answers left behind were humorous, such as "Throw it at your brother!"  or "Wait for it to rot."  Another person had written "Smoke it!"  Let's hope a child didn't leave that response.   

Further down, there was a wedding cake in a display case and it was all made from glass.  Next to it, there was a table with Post-it Notes and pencils and a board.  The question here said,

"What do you eat at a celebration?"

Some people posted "Wine" or "Hot Dogs" or "Cheese."

Owen very carefully wrote out these words, "Chocolate Cake."  Now that's my kind of celebration!

Still another station allowed the children to play with their food, so to speak.  I love those Doug and Melissa wooden puzzle toys.  Here were the sushi and pizza versions.  Nearby was a mini jukebox loaded with songs about food, such as "Toast" and "Peanut Butter Sandwich" and Weird Al Yankovich's "Eat it!"

Jenna likes her pizza with green peppers!

Evan tried his hand at Velcro chop sticks.
We finished up with the various displays in the hall of the Center for Creativity and moved into the Wonder Room.  This very cool area had just about enough room for the kids to blow off some steam and move around a little.  Owen crouched down by this sculpture and then soon realized it kind of has a scary look on its face.  He suddenly didn't like it anymore.


Jenna had fun making faces on this metal box with kitchen tools that had magnets attached to the back.  The eyes on this robot-looking face are made from stove burner pans, the nose is a tart pan and the mouth is a bread loaf pan.  You can't see them here, but the ears were metal cabinet door handles. 


Evan and Jenna spent a great deal of time at the table with the Moon Sand.  This is fun stuff to work with, but I cringed a bit watching them work and knead the dough that I knew many, many germ-covered hands had touched before them.  Where's my hand sanitizer?


While the other two worked the dough, Owen discovered this neat little area that supplied many little "S hooks" and colorful, odd-shaped pieces to connect together.


The key was to balance it out so that one side didn't get weighed down.

Reach Owen!
Finally, we left the Center for Creativity and the Wonder Room and moved onto the Galleries on the second floor.  At last, I stumbled upon what I believed to be the only Dale Chihuly currently in the building.


The kids grew a bit quiet when we entered into the area with all of the sculptures.  I was looking for a teachable moment and drew their attention to the fact that sculptures can be made out of many things, such as wood, marble, bronze, clay...

"Oh, look guys, it's Adam and Eve!" I pointed out.  My kids know the story well.


Jenna moves in for a closer look.  "Eww, gross!"  Okay, so they don't depict it exactly like that in their fun little Sunday School lesson pages.  Then, in an awkward voice, Evan asks, "Why did they have to make all of these statues of people who are naked?"  Funny, he has no problem with nakedness when he's getting ready to take a bath at night.  Can anyone say STREAKER?!?!

And on that note, we stumbled upon this strangely weird display of art.  Standing in the room, you would think there truly was a shirtless man standing there with his back to you.  This was so incredible life-like. 

And a bit creepy too.


As we moved in closer, you can examine the detail - hair for hair!


We were growing a bit weary and tired at this point.  We had been at the museum for two hours and there was still so much more to see, but we hadn't been home since we left for church in the morning and it was time to make our way to the exit door.

Along the way, we enjoyed lots of art like these:


I almost forgot to mention that in one of the rooms, with lots of stuffy, boring artwork, they were hosting a scavenger hunt.  There was a list of approximately 20 items you needed to find hidden in the paintings.  Almost like an "I Spy" kind of thing.  I helped Owen, but Evan and Jenna were on their own.  When we were walking out, I asked Owen what his favorite part of the museum was and he said, "I liked the room where we had to find things."  "Cool!" I thought.  Here I figured his favorite part would have been playing with twist ties or wooden sushi!

After another satisfying visit to the CMA, we drove out of the parking lot and enjoyed the outdoor art from the nearby Columbus College of Art and Design.  No matter how many times I see this, I always think it's so cool.